
CENG
160/260
GIS
in Water Resources
|
CENG
160/260
|
|||
|
GIS
in Water Resources
|
For the GIS class, some basic knowledge of some computer management techniques is helpful. This is not very high level, and what I describe below should get you most of the way there.
1) If ArcMap will not start or behaves erratically (e.g., menus or toolbars disappear) there are two things you can try. First, click the start button and Computer to check if you have filled up your space on the network (z: drive). That's by far the most common cause of trouble. Second, if you have not exceeded your quota, you can do this: Navigate z:/dcengr/AppData and delete the ESRI folder, then log out completely, log in again, and start ArcMap. If you cannot see the AppData folder, in a Windows explorer window go to Tools -> Folder Options > View tab, and select the option to show hidden files and folders.
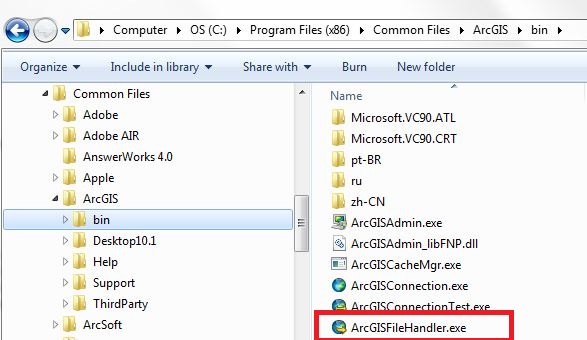
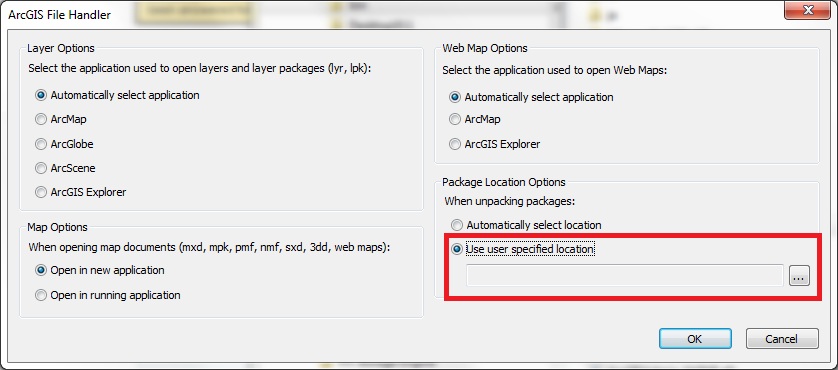
2) When opening an ArcGIS map package (an .mpk file) be sure to first close ArcMap. If you get the warning "Error Reading Package Contents" a common cause is that ArcGIS is not finding anough disk space to download the basemaps associated with the map. While you may have downloaded the .mpk file to a flash drive or some other directory with plenty of available space, ArcGIS by default may try to put the some of the information in some other location (like your Z: drive) that does not have much space. You can fix this by opening Windows Explorer and navigating to C:\Program Files (x86)\Common Files\ArcGIS\bin\. Double-click on ArcGISFileHandler.exe as shown below. Specify "Use user specified location" and browse to your flash drive or whatever directory you are working with (and one that has several GB of available space!).
3) You may try to run a tool (like Raster Calculator or Map Algebra) and receive a message saying something about python files not being found:
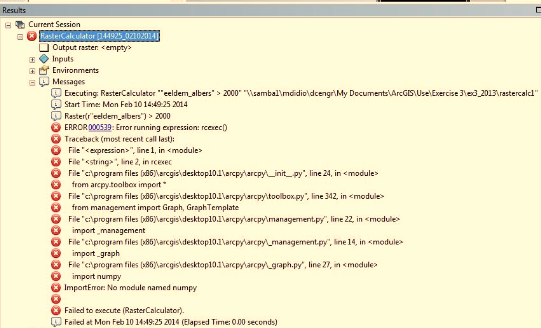
If this happens, do the following:
The problem is caused by multiple python installations existing, and different software looking for different packages. This will need to be updated as ArcGIS and python versions change. If the fix does not work, try logging out of the computer and logging into a fresh session.
4) If the ArcGIS software won't start due to failure to find the license server: This usually means the Design Center server with the license file for the software is having problems, or was rebooted and the license server didn't properly restart. When this happens, let the DC people know, by starting a ticket, following this process:
5) If ArcGIS does not have the functionality you expect, or does not work
properly: Check two things. 1) Close all ArcGIS applications, and then click
on the windows screen Start - All Programs - ArcGIS - Desktop Administrator
and check to be sure that the license manager is set correctly (see instructor for details) and that Availability shows a product of ArcInfo Desktop (Floating) with 3 features:
ArcInfo Desktop, 3D Analyst and Spatial Analyst. Also, in ArcCatalog, click
on the main menu at the top: Tools - Extensions and make sure 3D Analyst and
Spatial Analyst boxes are checked. 2) If there are toolboxes missing that should
be there, first try in ArcCatalog right-clicking on ArcToolbox and Add Toolbox.
Click the down arrow and click on the Toolboxes option, like this (second from
the bottom in the dropdown list shown here):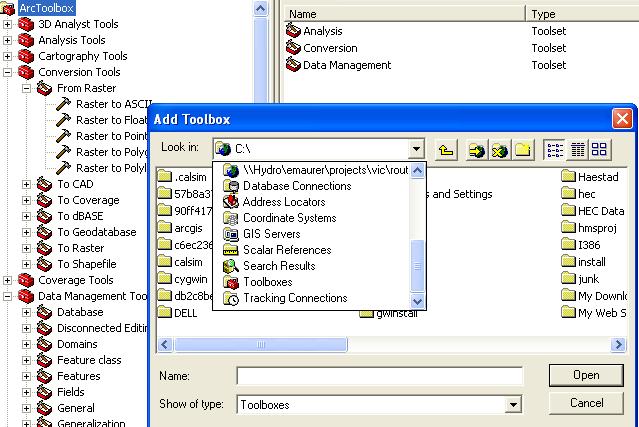
From there, select System Toolboxes, and add the toolbox(es) you would like. The toolbox you select should appear in the regular toolbox list for you to use from that point on.
6) Important notes on filenames in ArcGIS: While in some instances in ArcGIS it is permissible, it is recommended to NEVER use spaces in file or directory names. When using ArcINFO functionality (working with .e00 files, coverages, or grids, for example) spaces anywhere along the full directory path or in the filename can cause the commands to fail. Error messages may not be helpful in figuring out what the problem is, as is often the case. In general, spaces in file or directory names is ambiguous, unnecessary and sloppy computing practice, which is unfortunately promoted by some operating system designers.
7) Capturing images from the computer screen and pasting them into a Word
document: This is how the Exercise documents used in this class were created
and will be useful as you prepare your website and hardcopy report for the class
project. This is a generic procedure that can be used to capture any screen
showing plots of results in Excel, window interfaces in ArcGIS, or anything
else that appears on the screen. Just press the "Print Screen"
button on the keyboard when whatever you want to capture is on the screen. Then
go to Word and hit control-v to paste the image into the document.
This will paste the whole screen, which you probably don't want, so use the
cropping tool ![]() to
clip it down to show just what you want. Alt-PrintScreen captures only the active pane. In Windows 7 there is the Snipping tool in Accessories that allows you to capture any portion of the screen you like. the same ctrl-v command pastes what you've captured in each case.
to
clip it down to show just what you want. Alt-PrintScreen captures only the active pane. In Windows 7 there is the Snipping tool in Accessories that allows you to capture any portion of the screen you like. the same ctrl-v command pastes what you've captured in each case.
If you want to create a separate image file for a web site (like a gif, jpg, png,...), which can later be imported into an web site or document, you need to modify the above slightly. Capture the image exactly as above, but then paste it into another program that has more graphic capabilities, like Paint or Powerpoint. I prefer powerpoint, and these instructions use that. After pasting the image into powerpoint, crop it to the size you want as above. Then select the image by clicking on it, and right-click to select "Save as Picture" and type in a file name and the type of file you want to save it as.
8) Creating html for posting to a web site: The easiest way to do this is to create your document in Word just as you'd like your web site to appear. Then click "Save as html" and Word does exactly that. I never use this feature since Word is notorious for creating about the ugliest and most convoluted html code of any software, and often only properly displays (no surprise here) in Microsoft's Internet Explorer browser. This means it may not work for those of us who prefer cleaner, faster, and more secure browsers like Mozilla Firefox. This problem with Word's software was recognized years ago by the developers of the Dreamweaver software, which I find very good for creating web pages, and is what I used to make these pages. Dreamweaver has a very useful command (seriously) "clean up Word html." You are free to use Word's html option, and I'll let you know if your page doesn't display properly on my browser. Dreamweaver or other commercial software can be purchased at an educational discount, and Mozilla also makes a decent free software package for html editing. If you are particularly ambitious, you can also write html directly with a text editor (Wordpad, Notepad++, emacs), which is a useful skill to know when you want a very specific feature in your html, or more importantly to include links in ebay or craigslist postings.
9) If you have trouble adding basemaps to your map, refer to this: http://blogs.esri.com/esri/supportcenter/2013/04/01/having-issues-adding-arcgis-online-basemaps-to-arcmap/, especially item 5. If you try step 9, also uncheck IE's "automatically detect settings" button.